

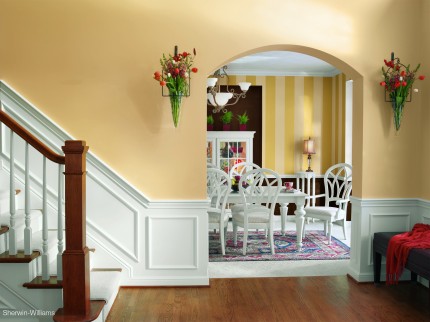
Imaginative decorating ideas bring rooms to life, and painting patterns is an easy way to do so without breaking the bank. A vertical stripe effect, for example, just takes a little bit of planning and preparation to take your room from dull to delightful.
- Step 1: Clean. Wipe the wall clean with a large, damp sponge and allow it to dry completely.
- Step 2: Paint a base. Your base coat will be one of your stripes. Let your base coat dry for 48 hours before starting the striping process.
- Step 2: Measure. Using a piece of lumber, measure the increments for your stripes and mark them on the lumber. We suggest stripes between 5” and 12” wide. Anything less would be dizzying, and anything wider would defeat the purpose of striping.
- Step 3: Mark. Hold the marked lumber up against your project wall and align it with a level. Mark the spots on the wall with a pencil in conjunction with the spots on your marked lumber.
- Step 4: Mark again. Using a long level, mark the top, middle, and bottom of the wall, keeping in mind that pencil can be seen through paint.
- Step 5: Tape. Remember, you’re only painting every other stripe, so you’ll tape out the pattern so that every other stripe is outlined by tape.
- Step 6: Burnish the tape. It’s vital to this design that paint doesn’t seep under the tape, so use a credit card to seal the edges.
- Step 7: Paint your stripes. Using a semi-gloss, paint the entire area of each stripe. Anything you miss will show up as contrasting sheens.
- Step 8: Remove the tape. Pull the tape off the wall, pulling in the direction away from the fresh paint.
Have patience and work meticulously through this process, since any slight deviation will be extremely noticeable. Your hard work will pay off with a room your friends and family will envy.
